Valhalla Falls
Summary: This is an oasis during peak summer heat.
Link to trailhead:Google Map link.
Length: 1.6 Miles.
Difficulty: Class III. Some scrambling required.
Matt’s Rating: Good.
Good resources:Modern Hiker.

The Valhalla Falls description sounds like it belongs in a Jurassic Park movie. Start by driving up a jeep road, hike along a creek, and swim in a large pool while trying to get underneath a waterfall. But it’s not, it’s right here at the Kern, with the trailhead ~20 minutes away from our Rafting Center.
If you’re looking for a hike that will kick your butt and leave you exhausted, then this isn’t it. Valhalla Falls attributes are significant though, especially in the peak summer heat as you won’t be in direct sunlight long and the swimming opportunity is a treat. (For those set on finding a long, challenging hike though, I suggest Power’s Peak.)
You’ll lose cell phone service pretty quickly so it’s important to load up the driving route ahead of time and you should probably pre-load this page too, especially if you’re directionally challenged.
Directions to the trailhead
Getting to the trailhead is a little more involved than the other hikes I’ve written about, so I’m breaking it down a bit more in this post.
- From Kernville, drive north up highway 99. Your turn-off destination is this pin: Google Map. Labeled on the map as 1.
- From that pin, take the dirt road that doubles back against highway 99 and at the dirt road junction, make a three-point turn to then head north again. Labeled on the map as 2.
- Follow this road and at the three-way intersect, take the middle option. Labeled 3 on the map below. If you cross over a creek, you’ve taken the wrong turn.
- Follow this road a short ways until you run into the water flume, pictured below and labeled on the map as 4. Google Map pin.

Getting to the falls
From the trailhead take the small path to your right and away from the creek and start heading up. The creek should be on your left. The trail at first will take you through open land but pretty quickly it turns back towards the creek and you head into the creek’s drainage and canyon.


Once in the drainage, you’ll come to an area where the trail splits, with the main trail keeping you in the drainage and the right fork leading you high and away from the creek. Stick to the left. At this point, the trail will eventually peter out and you’ll have to rock hop and scramble as you continue your way up the creek.
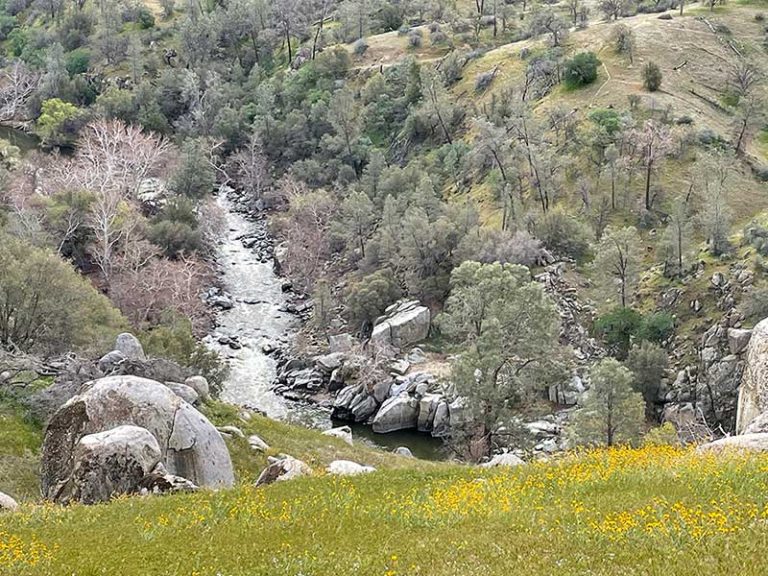
You’ve made it when you reach the pool and falls, which is pictured at the top of this post.
Can you do us a favor?
In addition to packing out any of your trash, please spend an extra five minutes picking up anything else left from others. Within our own company, we call this the 105% rule. By contributing just a little bit more than your share, the total effect of everyone following the 105% rule is a trash free environment.


how are the dirt road conditions
Hi Armando, I haven’t heard anything regarding the conditions of the dirt roads to this trailhead. I will post another comment once I hear an update.
they’ve repaired the dirt road but there is a mound that looks dicey to clear in a low clearance vehicle. we just parked at the base of the road and walked from the road. adds about 15 minutes or so but its easy
Thank you for the update, Armando! Very much appreciate it.
I’ve tried to get there 3 times and always get lost . I’ve taken the rincon trail up and ended up at a little bridge but the trail was killer . I knew I was off the directions